
Practical guide · My garden in Bran
Feeding and soil care
Compost, leaf mold and mulch in my garden among the mountains
I’ve come to believe that in a mountain garden, the soil deserves as much attention as the plants. You can choose the right plant and the right time to plant, but the roots will struggle if they end up in soil that floods after rain or dries out in two days.
What follows is my experience in my garden in Bran, Brașov County, Romania, at about 770 m (2,500 ft). Through trial and error I’ve learned how the soil behaves in different spots, which materials to use to improve it and how I make compost and mulch. It isn’t a recipe for every garden: I watch what happens here and adjust from one season to the next.
The starting point
Before choosing compost, mulch or a fertilizer, I look at the soil’s texture, drainage and the depth available to the roots. The description of the clayey and stony areas in my garden is in My garden → Soil and water. Below are the checks and care steps I use.
Three simple soil observations
I don’t need lab samples to see where water stands or where the soil crumbles between my fingers. Three checks give me clues about texture and drainage:
- The squeeze test. I squeeze a little slightly moist soil in my palm. A very sticky, compact ball suggests a lot of clay; soil that falls apart right away may have more sand or gravel. It’s a quick observation, not an exact classification.
- The jar test. I put soil and water in a jar, shake it and let the particles settle. The layers roughly show how much sand, silt and clay the sample contains. The result depends on how I took and prepared it, so I use it as a guide.
- The hole test. I dig a hole, wet the soil first, then watch how quickly water added again drains away. If it stands for a long time, I check the drainage before planting anything sensitive to wet. I don’t turn a single measurement into a diagnosis for the whole garden.
I also look at the wild mountain plants that come up on their own. Some prefer damp spots, others settle where the soil is poorer, but no weed can determine the soil’s pH on its own. Nor does having conifers nearby prove that my soil is acidic. A meter or test strip can give some direction; to decide whether I need to change the pH or add nutrients, a soil test is much more useful.
What helps both kinds of soil
Organic matter helps me in both clay soil and thin, stony soil, but it doesn’t solve every problem on its own. In heavy soil, compost and plant roots gradually help form a looser structure. In stony spots, a layer of organic matter on the surface reduces drying and improves water retention. Compost also brings nutrients, which is why I don’t think of it as just a “soil loosener” and I don’t apply large amounts without thinking about what’s already in the soil.
I haven’t found a miracle bag that transforms the soil in a weekend. I prefer moderate amounts, repeated year after year, and I watch how the plants respond. I cover the soil with compost or mulch where needed and avoid deeply turning, every season, the beds I’m trying to improve. Earthworms, roots and microorganisms need time; sometimes, though, I do need to work the soil locally, for example when planting or to fix a very compacted spot.
Two kinds of soil, two answers
| What I see in the garden | What I do | The limit I keep in mind |
|---|---|---|
| Clay soil, sticky after rain and hard in drought | I gradually add compost and keep the soil covered. | I check drainage; organic matter alone doesn’t fix waterlogging. |
| A thin layer of soil over rock that dries out quickly | I add organic matter on the surface and top up the mulch. | Root depth stays limited; I choose plants accordingly. |
The materials I use
I don’t use everything the guides recommend. I choose what I have on hand and what I can apply carefully, without assuming more automatically means better.
Bagged cow manure
I don’t make enough compost for the whole garden, so I also use bagged cow manure. I check the label: “dried” doesn’t necessarily mean “fully composted,” and products vary a lot. When the material is well rotted, it’s easier to handle than fresh manure, but even then I don’t consider it risk-free or suitable in any amount.
I’ve used it in fall and early spring, especially around the roses. I leave it on the surface, without piling it against the stems, and I set the amount by the product and where I’m applying it. If the soil already has a lot of phosphorus or salts, repeated manure applications can do more harm than good; that’s why a soil test would help me decide how much is needed. Before long spells of rain, I avoid spreading it on bare ground.
I also pay attention to where it comes from. Some herbicides used on pastures or in feed can persist in manure and affect sensitive plants, even after composting. If I change the product or supplier and have doubts, I can do a comparison test in pots with beans or tomatoes: one mix with the new material and one without. If the plants in the first pot develop distorted leaves, I don’t use that batch in the garden until I’ve figured out the cause.
Crushed eggshells
I collect eggshells, rinse them, let them dry and crush them. The photos show the difference between broken and ground shells well. Small pieces have more surface area, but even so they break down slowly. I add them in small amounts to the compost; I don’t count them as a substitute for a soil test or a calculated amendment when pH or calcium need correcting.

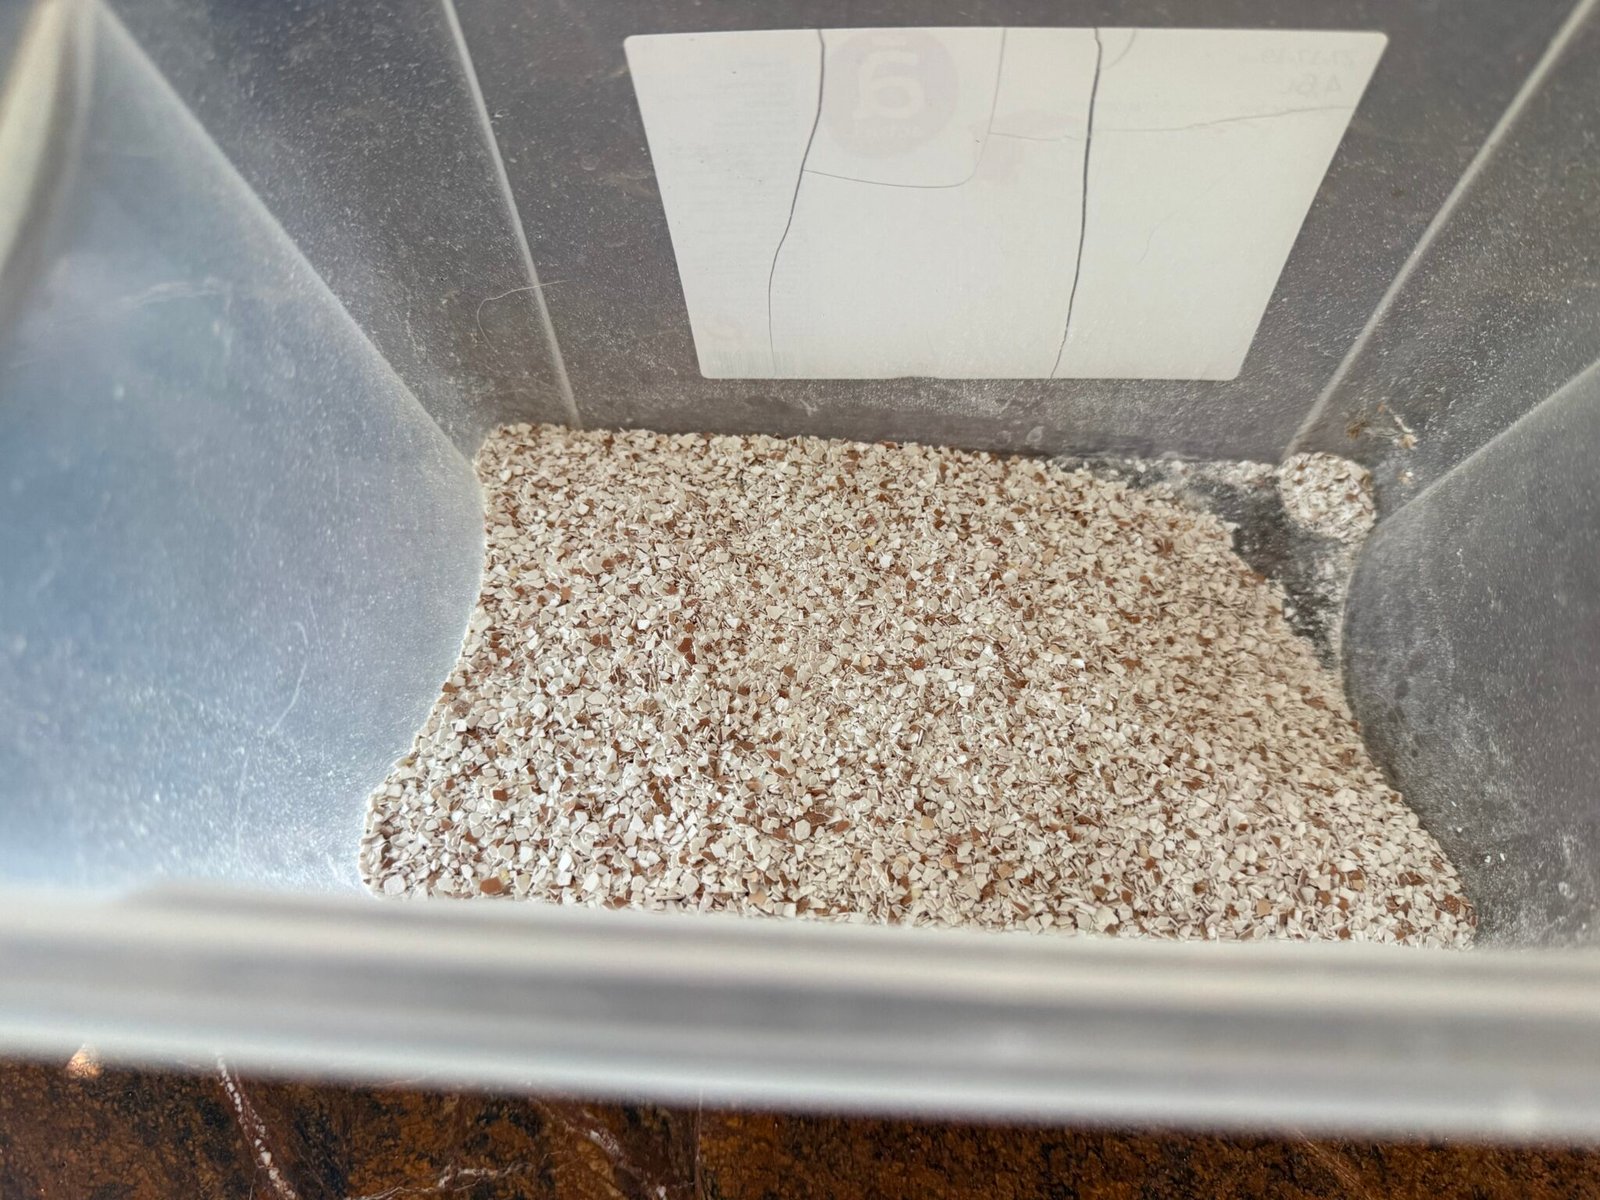
I’ve given up the idea that a ring of eggshells stops slugs. Nor is blossom-end rot in tomatoes usually fixed by sprinkling shells next to the plant: the problem is often linked to swings in moisture and how calcium moves within the plant. For me, eggshells remain a way to use a kitchen leftover, not a quick fix.
Coffee grounds
Most of my coffee grounds go into the compost. Even though they’re brown, I treat them as a relatively nitrogen-rich material and mix them with leaves or other dry materials. I don’t rely on them to acidify the soil for hydrangeas or blueberries: used grounds don’t predictably change the garden’s pH.
I don’t spread them alone in a thick layer. The fine particles can compact, and large amounts can stop seeds from germinating. If I use them directly in a bed, I add a little and mix it with the surface material.
Wood ash
I keep only ash from natural, untreated beech wood. It can supply potassium and calcium, but it raises soil pH quickly. That’s why I don’t recommend a universal dose; before another application, I want to check whether the soil actually needs this kind of amendment. I don’t use it on plants that prefer acidic soil, and I don’t combine it directly with manure or nitrogen fertilizers.
I keep the ash out of the rain. Water can wash out some of the potassium, but that doesn’t mean the rest becomes inert: the liming effect can remain. In years when I applied it moderately to the roses, the shoots seemed more vigorous, but I can’t attribute that change to the ash alone; the weather, water and the rest of the care mattered too.
Leaves and leaf mold
Fallen leaves are one of the best free resources in the garden. I shred them with the lawn mower and put them in a mesh bin or in perforated bags, where I keep them moist. They slowly turn into leaf mold, a material that covers and improves the soil, though it isn’t a concentrated fertilizer.
After about a year, I use the partly decomposed leaf mold as mulch. For seed or potting mixes, I let it break down further and don’t use it on its own. Oak and beech leaves make good leaf mold; I don’t assume they’ll acidify the soil just because they come from these trees. Tough leaves, including walnut, I shred and let decompose completely before using them near sensitive plants.
The compost in my garden
My own compost doesn’t cover all my needs, but it lets me return some of the plant waste to the garden. I make it at a pace set by the weather, the materials I have and how often I can turn the pile.
Green materials and brown materials
I mix two categories. Grass clippings, kitchen scraps and coffee grounds are relatively rich in nitrogen and moisture. Dry leaves, straw, shredded twigs and plain cardboard, without a glossy coating, bring more carbon and let air circulate.
As a starting point, I add several buckets of brown material to one of green, then I look at the pile. It isn’t a mathematical formula: volumes don’t tell me the exact carbon-to-nitrogen ratio. If it starts to smell bad or the material turns slimy, I add dry material and aerate it. If it’s hardly breaking down at all, I check the moisture; the contents should feel like a wrung-out sponge, neither dry nor soggy.
A bigger pile holds heat more easily and can make compost faster. A small one can work too, it’s just usually slower and cooler. I don’t necessarily aim for hot composting every season.
How I balance the compost
| What goes in | Examples from my garden | What I watch for |
|---|---|---|
| Green materials | Grass clippings, kitchen scraps, coffee grounds | I mix them with dry materials; I avoid a wet, slimy mass. |
| Brown materials | Dry leaves, straw, shredded twigs, plain cardboard | I use them for structure and aeration. |
| Water and air | I check the pile and mix it as needed | The contents should feel like a wrung-out sponge, not dry or soggy. |
What I don’t put in my regular compost
- Meat, fish, dairy, fats and oils, which can attract animals and cause smells.
- Plants with persistent diseases. My compost doesn’t always reach temperatures high enough to kill pathogens.
- Weeds with ripe seeds or hard-to-kill rhizomes, like couch grass and bindweed.
- Dog and cat waste. I have three large dogs, and their waste doesn’t go into the compost.
What winter changes in the mountains
In the cold months, decomposition slows down. That doesn’t mean my compost pile necessarily stops: inside one that’s big enough and protected, the process can continue. I cover the compost so it doesn’t get soaked during long spells of rain or snowmelt, and I make sure it still gets air. In spring I check the moisture and mix the materials if needed. For me, mature compost is usually ready later than the guides for warmer places promise.
Mulching
Of all the things I do for the soil, mulching has brought some of the most visible results. A suitable layer reduces evaporation, limits weeds and protects the soil surface from rain that forms a crust. In winter it can soften the swings between freezing and thawing, if it’s put down at the right time and without covering the plants’ crowns.
Shredded branches from the garden
After pruning the fruit trees, I keep the thin, healthy branches for the shredder. I spread the material on the surface, especially around shrubs, roses and perennials. Thicker wood breaks down more slowly; I don’t consider it useless, but I use it differently, for example on paths.
I don’t mix large amounts of fresh wood chips into the soil, where their breakdown can temporarily reduce the nitrogen available in the immediate area. If I leave them on the surface, the effect is much smaller. In freshly sown beds I prefer a finer mulch or leave room for the seedlings to come up. I don’t shred branches I know came from diseased trees.
Grass clippings
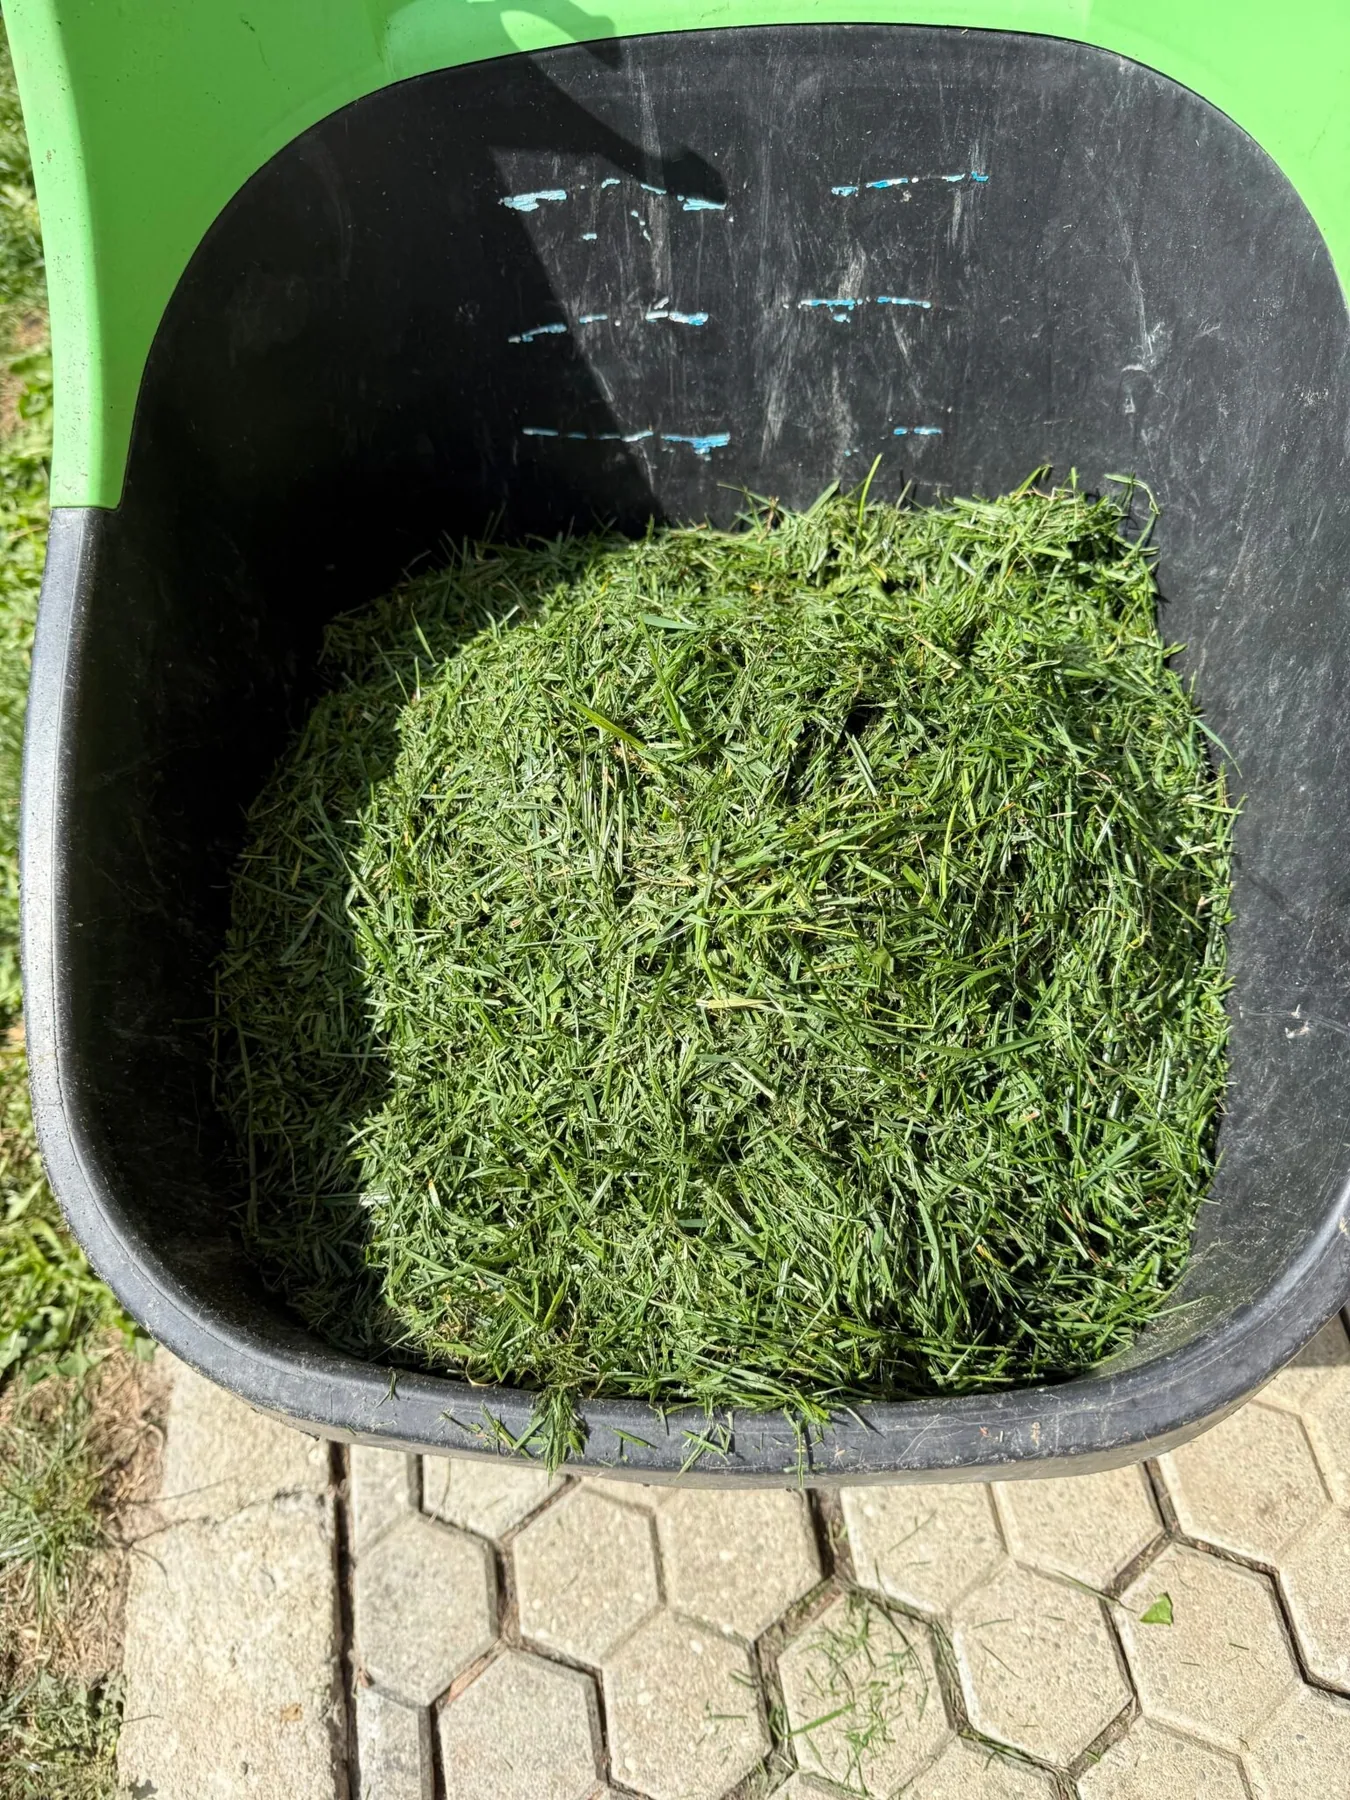
Freshly cut grass can form a slimy layer if I put it down thick and wet. I first spread it out to wilt, then apply it thinly, in several rounds. I don’t use clippings from areas treated with herbicides without checking the product’s instructions, and I avoid patches of lawn the dogs use for their business.
How much mulch and when
For woody mulch I usually use a layer a few centimeters thick, enough to cover the soil without forming a mound. I keep it clear of stems, plant crowns and the graft union on roses. In spring I don’t thicken the layer while the ground is still very cold; I top it up once it starts to warm.
In fall I can refresh the regular mulch to protect the soil surface. For young or tender plants, I add the extra layer meant specifically for winter only after the ground has cooled well and starts to freeze. That way I reduce sudden temperature swings without keeping the soil warm too long at the start of the cold season.
The mulch I use
| Material | Where and how I use it | What I watch out for |
|---|---|---|
| Shredded healthy branches | On the surface, near shrubs, roses and perennials | I keep it clear of crowns and stems; I don’t mix lots of fresh chips into the soil. |
| Wilted grass clippings | In thin layers, topped up in several rounds | I don’t put it down thick and wet; I avoid lawn that’s been treated or used by the dogs. |
| Partly decomposed leaf mold | As mulch, after about a year | For seed or potting mixes I let it break down further and don’t use it alone. |
My work calendar
In the mountains I follow the weather more closely than the date on the calendar. This is my usual rhythm, not a list of fixed deadlines:
- Late winter. I see how the garden came through the frost and check which mulch needs removing gradually. If I’m considering ash, I start from the soil’s pH, not from how much is available in the fireplace.
- Spring. I add mature compost where I plant and use cow manure for the plants that need it, following the product’s instructions. I top up the mulch once the soil warms.
- Summer. I use thin layers of wilted grass and top up the mulch where it has thinned. Coffee grounds mostly go to the compost.
- Fall. I gather leaves for leaf mold and cover bare soil with organic material. If I apply compost or cow manure, I take into account how wet the ground is and the rain in the forecast. I avoid nitrogen-heavy feeding that would push plants into late growth.
- Winter. I check the protection of tender plants during frosts without snow. Compost breaks down more slowly, but I don’t let it get waterlogged.
What I learned from my mistakes
- I dug too often and too deep where I was actually trying to build better soil structure.
- I sometimes looked for quick results from a big dose, instead of watching the effect of moderate, repeated additions.
- For years I put nearly whole eggshells in the beds and waited for an effect I never saw.
- I covered cold soil with a thick layer of mulch too early in spring.
- I burned the branches from pruning before realizing I could shred them and use them on paths or at the base of shrubs.
What has changed in the garden
The results didn’t show up overnight. After several seasons, the clay soil in some areas is easier to work, and the surface doesn’t harden as quickly after rain. In stony spots, the mulch holds moisture longer. I water some beds less often than before, although each summer’s weather also affects that comparison.
I see differences in the roses too: the bushes in areas where I’ve cared for the soil consistently seem more vigorous than those where I did less. I can’t say the soil is the only variable. But I can say that the attention I’ve given it has changed the way plants grow in my garden.
I’m still learning from every season. Sometimes the best decision is to add compost; other times it’s to leave the mulch alone, check the drainage or choose a plant for that spot that can thrive there.
What do you use for your soil? Which experiment made you change your habits?